Monday, February 28, 2011

Choices in the work room

Each week, when the challenges are posted, I get stuck for a few days in the 'idea' phase.
The trick is not thinking of something to do. For me, the trick is figuring out what to do in the time allotted!
This week, we are working with a "movie challenge". I love the saturated colors and the feel of the Nanny McPhee movies. (yes, I do)
There are beautiful hand knit pieces scattered throughout the movie.
In one scene, they showcase some Fair Isle love:

Maggie Gyllenhaal has this vest on for a long portion of the movie:

And one snazzy talented knitter has written the pattern for the sweater:

So, I'll just cast that on, and get that ready for the Wednesday deadline. Sure.
I mean, she already did all the 'heavy lifting' by writing the pattern, right? All I have to do is knit it! (and, of course, find the awesome flowered dress and cute belt that all mix & match to make this cute outfit.)

The other option was to make a butterfly quilt.
Because this, also, is so realistic given our time frames.

It's a crib quilt, for heaven's sake. Not a Cal King!

What to do?
First, I consult Kat, and she gently reminds me of reality. She takes my inspirations, and tries to help me scale a little bit down.
She's very good at that! Excellent "project manager" strategic thinking, applied to craft.
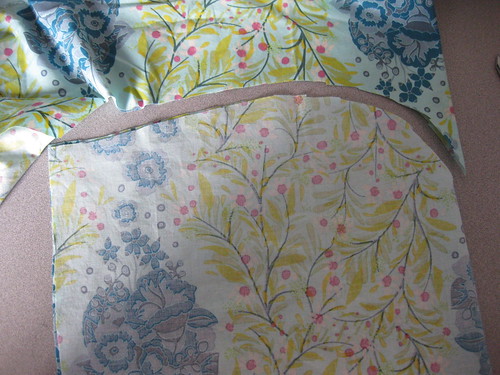
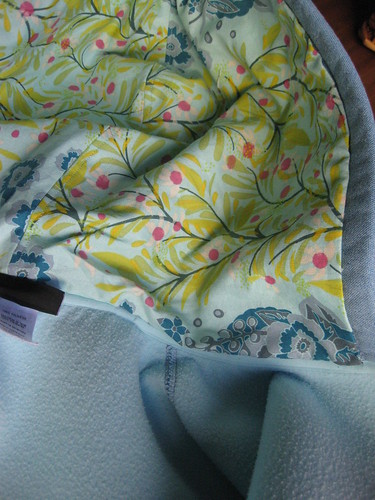
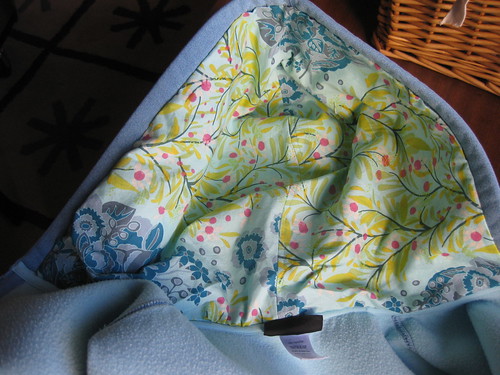
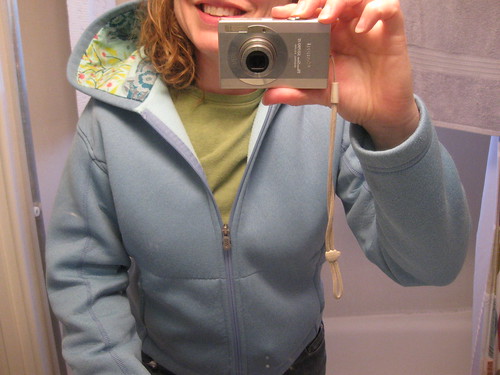
And in the end, here is where I am going:
Summer Holiday

My husband introduced me to Cliff Richard, and his wild 1963 musical romp. The mere words "summer holiday" will put that song in my head for the day.
I'm excited about my project. But, man, just THINK what I could have done if we had a MONTH!
Stay tuned for Wednesday!

Wednesday, February 23, 2011

Challenge 8 "Home Town"

For my Home Town Challenge this week, I chose to do something with the Ferry Plaza Building. It has such a rich history.

flowers at the market
And a beautiful, if over priced Farmer's Market on Saturdays.
A day trip
We really like to visit.
Ferry Building

When my Mom comes to visit she especially likes to make a trip there.
So I decided to make this for my Mom.
Ferry Plaza, Freezer paper
I'm really happy with how it came out.
Ferry Plaza
I hope she likes it.

Tuesday, February 22, 2011

Workroom:Freezer paper

One of the projects I wanted to try this year was freezer paper stenciling.
And certainly, lots of the iron crafters have done great stencils.

I think I picked an image that was not very well suited to the medium.
But, hey, another craft checked off my "to learn" list.
And I love the result. Stay tuned, the results will be posted tomorrow.

Wednesday, February 16, 2011

Midas touched the cookies

For the gold challenge, I wanted to do something in the kitchen.
I received a request for these cookies
So I geared up for the project.
Now, you have all made some cookies in your day. So have I. But, I have not undertaken anything like this, with a two year old's help.

Make the batter.
Refrigerate.
Flour a surface
Roll the dough out
Cut shapes
cutting cookies out
Get them from the surface, to the cookie sheet, and into the oven.
Make frosting.
Get the cookies out.
Cut out another set. Repeat.
Get them off the sheet, and onto cooling racks.
Frost with a first layer of white.
IMG_4425
Make more frosting.
Color frosting in tiny batches.
Carefully frost 2/3 of the cookie.
IMG_4426
Let them dry.
Keep the kiddo from throwing things into then, and from eating them.
Dust a few select cookies with the 'pearl' powder.
Lavender and gold
Get them in a bright light, and match them to their Pantone colors.
Get the edible ink out, and carefully write on them.
IMG_4431
Set up the photo shoot.
IMG_4434
This was such a process, I reminded myself that this is not something to try to squeeze into the margins during the holidays. I enjoy baking, don't get me wrong. But it was the size of my kitchen, and the protection maneuvers that needed to be implemented that made the game a little more strenuous.

The best part, by far, was dusting the cookies with the gold dust.
IMG_4436
I used a fine brush and just 'painted' it on dry. It was tempting to just keep going and going! I turned into a fairy, and I was ready to 'sprinkle my gold dust' onto everything!
They are super yummy. Happy Valentines Day to the lovely Graphic designer in my life.

Sunday, February 13, 2011

The Midas Touch

While I am supposed to be working on my gold craft, I have been furiously typing and editing a proposal letter.


And then the irony struck me.
While it may not be 'metallic', and it is not 'crafty', if this letter is met with approval, then I will definitely have made something turn to gold.

I'll keep you posted. Fingers crossed!

Wednesday, February 9, 2011

Iron Craft Challenge #6 Winter Contest

For this week, the challenge is actually a contest, so I will admit to you, I considered skipping it. (I am co-host of the challenge, and I'm not in the running for a prize.)
Then, I was struck by inspiration!
I found a new (to me) jacket at a consignment store. I love the colors, and it fits well. It is the perfect weight for San Francisco. It does have a strange texture. It is like those hotel blankets with a sponge foam layer inside of them. I am a little preoccupied by neoprene like consistency.
I decided to make it feel a little less like a hunting jacket, I would line the hood in a beautiful fabric. Cut to me, searching, hip deep in my stash. I found a perfect piece of Anna Maria Horner fabric!

And voila!

I used a fabric pen, and traced around the hood.
trace
Then cut the piece out,
cut

and sewed up the back seam.
hoodie
Then, I hand stitched the lining into the hood at the neck, and around the face.
lined hood
I am so pleased with how this turned out. It gives a lovely surprise pop of color in the back.
self, and hoodie
While, I have to say, I was actually in shorts for more than one day last week when I was making this, I am still very sure I will be using it in months when the rest of the country is bragging about their weather.
Stay warm.

Happy Crafting!

Tuesday, February 8, 2011

In the workroom

I was struck by inspiration for our Winter challenge.
Here is a work room sneak peek:
For this week, the challenge is actually a contest, so I will admit to you, I considered skipping it. (I am co-host of the challenge, and I'm not in the running for a prize.)
Then, I was struck by inspiration!
I found a new (to me) jacket at a consignment store. I love the colors, and it fits well. It is the perfect weight for San Francisco. It does have a strange texture. It is like those hotel blankets with a sponge foam layer inside of them. I am a little preoccupied by neoprene like consistency.
I decided to make it feel a little less like a hunting jacket, I would line the hood in a beautiful fabric. Cut to me, searching, hip deep in my stash. I found a perfect piece of Anna Maria Horner fabric!

And voila!

I used a fabric pen, and traced around the hood.
trace
Then cut the piece out,
cut

and sewed up the back seam.
hoodie
Then, I hand stitched the lining into the hood at the neck, and around the face.
lined hood
I am so pleased with how this turned out. It gives a lovely surprise pop of color in the back.
self, and hoodie
While, I have to say, I was actually in shorts for more than one day last week when I was making this, I am still very sure I will be using it in months when the rest of the country is bragging about their weather.
Stay warm.

Happy Crafting!

Thursday, February 3, 2011

Valentines

And here we have a heart garland.
two color surprise
(What? Another garland? For heaven sake woman.)
What can I tell you. I love a garland. I love that you can put it up, and then take it down, and enjoy it next year!
circle
It is bright and cheerful. And since "Jambi" was born, we have had so many hearts in the house. What's a few more?
flipped for you
My inspiration was certainly these Mochi Mochi hearts.
But after seaming a few of these together, I modified the pattern to be two sided. Then we can incorporate another color, and avoid at least 1/3 of the tedious seaming.

Here is the modified pattern.
Two color mini heart in one piece:

Cast on 1 of each color
Knit in the front and back (Kfb) of each stitch (4 st)
(with the color the stitch is in. Be sure to twist the yarns to connect the two hearts where the colors join. Otherwise, you will be knitting two separate hearts. Twist EVERY time, to avoid a hole.)
purl back
Kfb each stitch (8 st. 4 each color)
Purl back
Kfb, k1, Kfb, K1 change color, repeat
Purl back (12 stitches, 6 each color
You are not protecting the edge stitches to make the seams cleaner and easier. )
KFB, knit to the next to last stitch in the color, Kfb, K
Switch to other color, repeat
Purl back
Continue until you have 28 total, 14 of each color
Those are your base triangles of the heart.
Now, we will decrease the top lobes of the heart one at a time.
K2tog, K5, turn P2tog, P2, P2tog
Turn K2tog, K2tog, pass one over the other, break off 20 inches, pass the yarn through the last stitch to close the loop, sew the yarn down the lobe of the heart to the next knit stitches. K5, K2tog, turn
P2tog, P2, P2tog
K2tog, K2tog
Pass on knit over the other. Pull the yarn through the last loop to finish.
Repeat with the other color for the other side of the heart.

Pick one color to use to seam the hearts together. If you seam carefully and pull your stitches a little bit tight, the color will not show ‘through’.
sunny side up
Enjoy separately, or string them together into a garland.